As proud plant parents, we love to nurture our leafy friends with love, sunlight, and TLC. As we watch our green companions grow and thrive, we may start to notice that they’re getting a bit too cozy in their pots. That’s right—it’s time to talk about repotting. Knowing when and how to repot your plants is crucial for their health and happiness, so let’s dive into the ins and outs of this essential gardening task.
When to Repot:
How do you know when it’s time to repot your plant? Here are a few signs that your leafy friend is ready for a new home:
1. Roots Peeking Through: If you notice roots poking out of the drainage holes at the bottom of your plant’s pot or circling around the surface of the soil, that is a clear sign that your plant has outgrown its current container and needs more room to spread its roots.
2. Stunted Growth: Has your plant stopped growing or started looking a bit sad and droopy, despite your best efforts to care for it? This could be a sign that it’s root-bound, meaning its roots have become tightly packed and unable to absorb water and nutrients effectively.
3. Watering Woes: Are you finding yourself watering your plant more frequently than usual, only to have the water run straight through the pot and out the bottom without being absorbed? This could indicate that your plant’s roots have filled the pot, leaving little room for water to be absorbed by the soil.
4. Soil Depletion: Over time, the soil in your plant’s pot can become depleted of nutrients, leading to poor drainage and reduced aeration. If you notice that the soil in the pot is compacted, dry, or lacking in nutrients, it may be time to repot and refresh the soil.
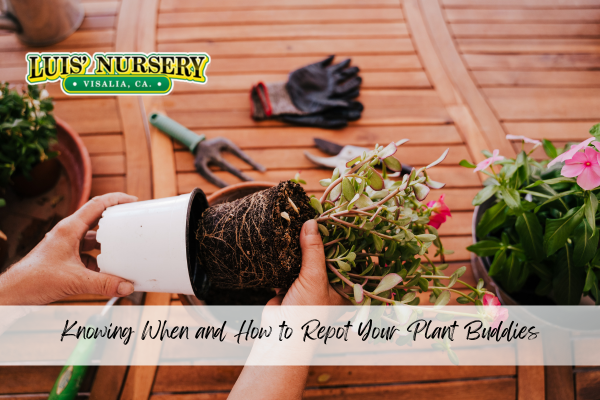
How to Repot:
Now that you’ve identified the signs that your plant needs a new home, it’s time to roll up your sleeves and get repotting. Here’s a little guide to help you through the process:
1. Choose the Right Pot: When selecting a new pot for your plant, choose one that is slightly larger than its current pot, with drainage holes at the bottom to allow excess water to escape. Avoid pots that are too large, as they can hold excess moisture and lead to root rot.
2. Prepare the Pot: Before repotting your plant, thoroughly clean and disinfect the new pot to remove any dirt, debris, or pests that may be lurking inside. Place a layer of fresh potting soil in the bottom of the pot to provide a stable base for your plant.
3. Remove the Plant: Carefully remove your plant from its current pot, being mindful not to damage its roots. Gently loosen the roots from the soil and inspect them for any signs of damage or disease.
4. Add Fresh Soil: Place your plant in the center of the new pot and fill in the gaps around the sides with fresh potting soil, pressing down lightly to ensure good contact between the roots and the soil. Make sure to leave a small gap between the top of the soil and the rim of the pot to allow room for watering.
5. Water and Care: After repotting your plant, give it a thorough watering to help settle the soil and encourage new root growth. Place your plant in a bright, indirect location and continue to provide it with the care and attention it needs to thrive in its new home.
Repotting your plants may seem like a daunting task, but with a little information and some tender loving care, you can ensure that your leafy friends continue to grow and flourish in their new homes. Keep an eye on those plant buddies for signs that it’s time to repot, and don’t be afraid to give your plants the space they need to spread their roots and reach their full potential. Happy repotting, fellow plant parents!