It’s officially Fall! We can’t believe how fast this year and summer have flown by. It’s now the time of year that we look forward to crisp fall air, delicious baked goods, and comfy sweaters.
With Halloween and Thanksgiving on the horizon we are often looking for new ideas to decorate our homes and gardens in order to fully embrace the season. Have you ever made Succulent Pumpkins? These are a fun craft you can do on your own or as a family.
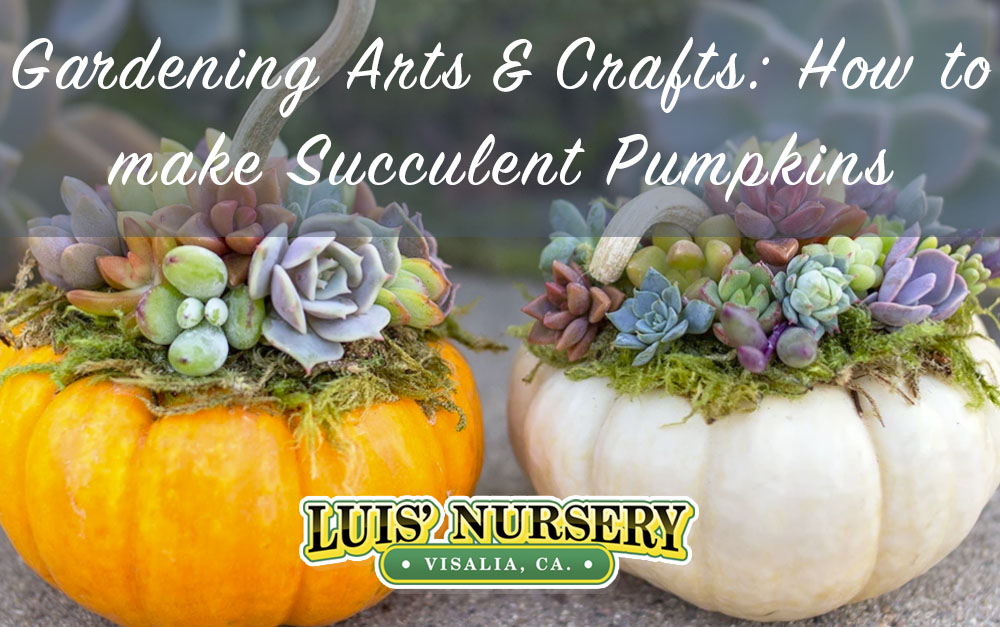
Succulent Pumpkins are easy to make and require only a few supplies.
Supplies Needed:
- Hot glue gun
- Assorted succulent clippings and decorative moss
- Garden clippers
- Pumpkin/s- preferably with a flat top
Decorating Process:
- Collect assorted succulents and moss – Gather together some of your favorite succulents and some moss for filler. Some good succulents to use are Sempervivium, Sedum, Echeveria and Jade
- Wipe all dirt off the pumpkin – You’ll want to make sure that your pumpkin is clean and dirt free. The surface will be better prepared for the hot glue to stick and have a cleaner result. VERY important that your pumpkin is dry before you move on.
- Hot glue time – Carefully add a skinny circle of hot glue to the top of the pumpkin
- Add your moss to the top – If you don’t want moss you can skip this step, but it will create a different look. Apply extra glue as needed and cover the top of your pumpkin with moss. Let it dry.
- Add succulent cuttings –Take your clippers and cut off little pieces of your favorite succulents
- Remove lower leaves – You will want to remove the lower leaves from the succulents. You don’t have to worry about them being wasted, because you can actually plant the leaves and they will grow into new plants!
- Arrange clippings on top of moss –Take each clipping and apply a little glue to the bottom and tuck it into the moss. Focus on using the largest clippings first and try to arrange by color and shapes to make them more visually interesting. Add the medium and smaller clippings making sure to fill in the bare spots.
- Take a pic! – Now’s the time to check and appreciate your work. Take a picture of your Instagram-worthy pumpkin and share your creation. Take time to share it with us too, we’d love to see it! You can tag Luis Nursery on Instagram or Facebook!
There is no wrong way to make these. Get creative by using different size and color pumpkins. You can display them in different areas of your home as accent décor or on front porch. They would also make cute gifts to brighten a friend or neighbors’ day! The pumpkins will last a few weeks and when they are spent you can remove the succulents and replant them! We look forward to seeing your projects!